
Advanced Techniques for Fondant Decoration: Master Smooth Fondant Finishes for Professional Cakes
Creating a flawless, professional-looking cake requires mastering the art of fondant decoration. At Delights Bakery, we’re passionate about sharing baking tips to elevate your cake decorating skills. Fondant offers a sleek, versatile canvas for stunning designs, but achieving a smooth, polished finish demands advanced techniques. From rolling to sculpting, this guide covers everything you need to create professional cakes with perfect fondant finishes. Whether you’re decorating for weddings or birthdays, let’s dive into these fondant techniques to transform your cakes into edible art!
Why Fondant Is Perfect for Professional Cakes?
Fondant is a baker’s go-to for high-end cake designs:
- Smooth Finish: Creates a flawless, polished surface for elegant cakes.
- Versatile Design: Easily molded into shapes, figures, and intricate details.
- Customizable Colors: Can be dyed to match any theme or aesthetic.
- Long-Lasting: Preserves cake freshness and holds up in warm conditions.
- Professional Appeal: Gives cakes a refined, bakery-quality look.
Essential Tools for Fondant Decoration
Having the right tools is crucial for professional results:
- Rolling Pin: A non-stick, smooth rolling pin for even fondant rolling.
- Fondant Smoother: Ensures a seamless, bubble-free finish.
- Cutting Tools: Sharp knives or pizza cutters for precise trimming.
- Molding Tools: Ball tools, veiners, and sculpting tools for detailed shapes.
- Cornstarch or Powdered Sugar: Prevents sticking during rolling.
- Turntable: Allows easy access to all sides of the cake.
- Edible Glue or Water: For adhering fondant decorations.
Advanced Fondant Techniques
Master these techniques for a flawless fondant finish:
1. Rolling Fondant Evenly
- Knead fondant until soft and pliable, avoiding overworking to prevent drying.
- Dust your surface lightly with cornstarch or powdered sugar to prevent sticking.
- Roll to a consistent 1/8-inch thickness, using guide rings or spacers for uniformity.
- Lift and rotate the fondant frequently to avoid sticking and ensure an even shape.
2. Covering a Cake Smoothly
- Apply a thin layer of buttercream or ganache for a smooth base and better adhesion.
- Roll fondant 4-5 inches larger than the cake’s diameter to cover sides fully.
- Gently drape fondant over the cake, using a rolling pin to lift without stretching.
- Smooth the top with a fondant smoother, working downward to eliminate air bubbles and wrinkles.
- Trim excess fondant with a sharp knife or pizza cutter for a clean edge.
3. Creating Sharp Edges
- Use two fondant smoothers to press along the top edge, creating a crisp 90-degree angle.
- Chill the cake briefly before smoothing to firm up the fondant.
- Polish edges with your hands or a soft cloth for a professional finish.
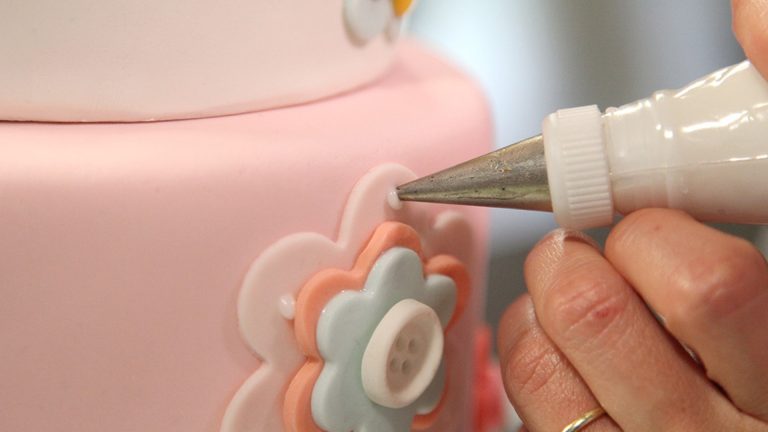
4. Sculpting Fondant Decorations
- Use food-safe molds or freehand sculpting tools for flowers, figures, or patterns.
- Blend colors gradually for realistic effects, like petal shading.
- Allow decorations to dry on foam pads to maintain shape before attaching.
- Secure with edible glue or a dab of water for seamless adhesion.
5. Texturing and Embossing
- Use textured mats or rollers to add patterns like lace or wood grain.
- Emboss with stamps or tools before fondant sets for intricate details.
- Apply edible dust or paint for a metallic or shimmering effect.
Tips for Perfect Fondant Finishes
Elevate your cake design with these expert tips:
- Work in a Cool Environment: Fondant becomes sticky in heat; keep your workspace at 65-70°F (18-21°C).
- Store Fondant Properly: Wrap tightly in plastic to prevent drying; store at room temperature.
- Use Fresh Fondant: Old fondant can crack or tear; check for pliability before use.
- Chill Cakes Before Covering: A firm cake base prevents dents and ensures smooth application.
- Polish with Shortening: Lightly rub vegetable shortening on fondant for a glossy finish.
- Practice Patience: Take time to smooth and adjust for a flawless result.
Common Mistakes to Avoid
- Overkneading Fondant: Overworking makes it dry and prone to cracking.
- Using Too Much Dusting Powder: Excess cornstarch or sugar can dry out fondant or leave marks.
- Stretching Fondant: Pulling while covering causes tears; drape gently and smooth downward.
- Ignoring Cake Prep: Uneven buttercream or crumbs lead to bumpy fondant surfaces.
- Rushing Decorations: Allow sculpted pieces to set before handling to avoid distortion.
Troubleshooting Fondant Issues
- Cracks or Tears: Knead fondant more or roll thicker; ensure cake is chilled.
- Air Bubbles: Pierce with a pin and smooth gently to release air.
- Sticky Fondant: Use more cornstarch or work in a cooler environment.
- Uneven Edges: Re-trim with a sharp knife and smooth with a fondant smoother.
- Fading Colors: Use gel food coloring and store away from sunlight.
Creative Fondant Ideas
Take your cake decorating to the next level:
- Marble Effect: Blend two fondant colors lightly for a swirled, elegant look.
- 3D Figures: Sculpt animals, flowers, or characters for themed cakes.
- Lace Appliques: Create delicate lace patterns with edible molds or cutters.
- Metallic Accents: Brush with edible gold or silver dust for a luxurious touch.
- Textured Layers: Combine smooth and embossed fondant for visual contrast.
Frequently Asked Questions
Can I Use Homemade Fondant?
Yes, but store-bought fondant is often smoother and easier for beginners.
How Do I Prevent Fondant from Drying Out?
Wrap tightly in plastic and work quickly; knead in a bit of shortening if it dries.
Can I Refrigerate a Fondant-Covered Cake?
Yes, but store in a cardboard box to avoid condensation; bring to room temperature before serving.
How Do I Color Fondant?
Use gel food coloring and knead thoroughly for even color distribution.
Explore Our Baking Tips & Techniques!Final Thoughts
Mastering fondant decoration opens up endless possibilities for creating stunning professional cakes. At Delights Bakery, we’re dedicated to sharing fondant techniques that elevate your baking. Try these advanced tips, share your fondant creations in the comments below, and let us know your favorite cake designs for a chance to feature them!
Comments
Post a Comment