
Kneading Dough: Hand vs. Machine Techniques for Perfect Bread Baking
Kneading dough is the heartbeat of bread baking, transforming simple ingredients into the foundation of a perfect loaf. At Delights Bakery, we believe that mastering dough kneading techniques is essential for every home baker striving for artisan bread. Whether you’re kneading by hand for a tactile experience or using a machine for efficiency, each method has its unique advantages. In this baking tips guide, we’ll compare hand kneading vs. machine kneading, share expert advice, and provide insights to elevate your bread making skills. Let’s dive into the art and science of kneading dough!
Why Kneading Dough Matters
Kneading is more than mixing—it’s a critical step that develops gluten, aligns proteins, and creates the structure for a light, chewy loaf. Proper kneading ensures:
- Gluten Development: Strengthens dough for a well-risen, elastic texture.
- Air Incorporation: Traps air for a lighter crumb structure.
- Even Ingredient Distribution: Ensures consistent flavor and texture.
- Bread Quality: Affects crust, crumb, and overall mouthfeel of artisan bread.
Choosing between hand kneading and machine kneading depends on your time, skill level, and desired baking experience.
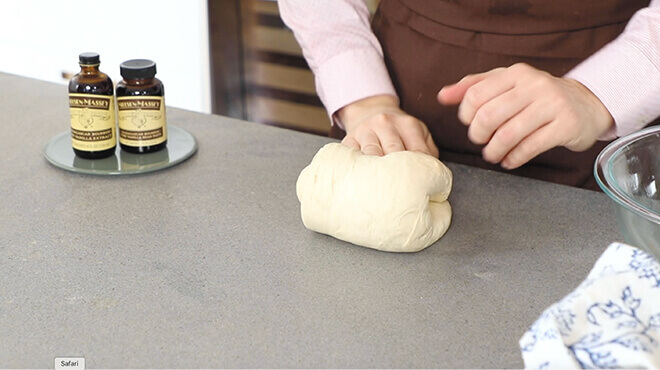
Hand Kneading: The Traditional Approach
Hand kneading is a time-honored technique that connects you directly to the dough. It’s ideal for small batches and offers a sensory experience that machines can’t replicate. Here’s how it works and why it’s special:
How to Hand Knead
- Mix Ingredients: Combine flour, water, yeast, and salt in a bowl until a shaggy dough forms.
- Begin Kneading: Turn dough onto a lightly floured surface. Fold the dough over itself, press with the heel of your hand, and rotate 90 degrees. Repeat for 8-12 minutes.
- Check Readiness: Perform the windowpane test—stretch a small piece of dough thin. If it holds without tearing, it’s ready.
Benefits of Hand Kneading
- Control: Feel the dough’s texture and adjust as needed.
- Connection: Build a deeper understanding of dough development.
- No Equipment Needed: Perfect for beginners or minimal kitchens.
- Therapeutic: Kneading by hand is meditative and rewarding.
Challenges
- Time-Intensive: Requires 8-12 minutes of active kneading.
- Physical Effort: Can be tiring, especially for stiff doughs.
- Inconsistency: Results vary based on skill and technique.
Machine Kneading: Efficiency and Precision
Machine kneading uses a stand mixer or bread machine to streamline the process, making it ideal for busy bakers or large batches. Here’s what you need to know:
How to Machine Knead
- Set Up Mixer: Attach a dough hook to your stand mixer. Add ingredients to the bowl.
- Knead: Mix on low speed for 2 minutes to combine, then increase to medium speed for 6-8 minutes.
- Check Dough: Use the windowpane test to confirm gluten development.
Benefits of Machine Kneading
- Time-Saving: Cuts kneading time by half compared to hand kneading.
- Consistency: Produces uniform results with less effort.
- Handles Tough Doughs: Ideal for high-hydration or enriched doughs.
- Multitasking: Frees you up to prep other ingredients.
Challenges
- Equipment Cost: Stand mixers or bread machines can be expensive.
- Over-Kneading Risk: Machines can overwork dough if not monitored.
- Less Tactile: Misses the hands-on connection of manual kneading.
Hand vs. Machine: Which Is Best?
Choosing between hand kneading and machine kneading depends on your goals:
- Choose Hand Kneading If: You enjoy a hands-on experience, are baking small batches, or want to develop your skills.
- Choose Machine Kneading If: You’re short on time, baking large or complex doughs, or prioritize consistency.
At Delights Bakery, we recommend trying both to discover what suits your style. Hand kneading is perfect for rustic loaves like sourdough bread, while machine kneading excels for enriched doughs like brioche.
Tips for Perfect Dough Kneading
Elevate your bread baking techniques with these expert tips:
- Use the Windowpane Test: Stretch dough to check for a thin, translucent membrane.
- Adjust Flour Gradually: Add flour sparingly to avoid a dry, tough dough.
- Monitor Dough Temperature: Aim for 75-80°F (24-27°C) for optimal gluten development.
- Rest the Dough: A 10-20 minute autolyse before kneading improves texture.
- Practice Consistency: Knead evenly to ensure uniform gluten strands.
Common Mistakes to Avoid
- Over-Kneading: Leads to tight, chewy bread; stop once dough is smooth and elastic.
- Under-Kneading: Results in dense, flat loaves; knead until the windowpane test passes.
- Adding Too Much Flour: Makes dough stiff; use minimal flour on the work surface.
- Ignoring Dough Cues: Watch for smoothness and elasticity, not just time.
Frequently Asked Questions
How Long Should I Knead Dough?
Hand kneading takes 8-12 minutes; machine kneading takes 6-8 minutes, depending on the recipe.
Can I Knead Dough Too Much?
Yes, over-kneading breaks down gluten, resulting in tough bread. Use the windowpane test to check.
Is Hand Kneading Better for Artisan Bread?
It’s preferred for a hands-on feel and small batches but not inherently better; both methods work well.
What If My Dough Is Too Sticky?
Use wet hands or a light dusting of flour, and consider a higher-protein flour for better structure.
Secrets to a Fluffy Soufflé Every TimeFinal Thoughts
Kneading dough is a cornerstone of bread making, whether you choose the tactile joy of hand kneading or the efficiency of machine kneading. At Delights Bakery, we’re passionate about sharing baking tips to help you craft artisan bread that delights. Try both techniques, experiment with our recipes, and share your kneading experiences in the comments below! Have a favorite bread baking tip? Let us know for a chance to feature it!
Comments
Post a Comment