
How to Make Artisan Sourdough Bread at Home
There's something magical about baking your own sourdough bread—the crisp crust, the tangy flavor, and the airy, chewy crumb make it a favorite among bread lovers. While it may seem intimidating at first, making artisan sourdough at home is a rewarding process that requires just a few simple ingredients: flour, water, salt, and a well-maintained sourdough starter.
In this comprehensive guide, we'll walk you through each step to create a delicious, bakery-quality sourdough loaf in your own kitchen.
- No commercial yeast needed
- Uses just 4 simple ingredients
- Creates bakery-quality results
- Perfect for sandwiches or toast
Ingredients You'll Need
- 500g bread flour (or a mix of bread flour and whole wheat flour)
- 350g water (70% hydration)
- 100g active sourdough starter (learn how to make your own starter)
- 10g salt (fine sea salt works best)
Step-by-Step Sourdough Baking Process
1. Prepare Your Sourdough Starter
Before baking, ensure your starter is active and bubbly. Feed it with equal parts flour and water (e.g., 50g starter + 50g flour + 50g water) and let it rise for 4–6 hours at room temperature until it doubles in size and passes the float test.
2. Mix and Autolyse the Dough
- In a large mixing bowl, combine 500g flour and 350g water.
- Mix until no dry flour remains (this initial mix is called the "autolyse" stage).
- Cover and let rest for 30 minutes to allow the flour to fully hydrate.
3. Incorporate Starter and Salt
- Add 100g active starter and 10g salt to the dough.
- Mix thoroughly using wet hands or a dough scraper until evenly incorporated.
- Let the dough rest for another 30 minutes before beginning stretch and folds.
4. Bulk Fermentation with Stretch and Folds
Over the next 3–4 hours, perform a series of stretch and folds every 30 minutes to develop gluten structure:
- Wet your hands to prevent sticking.
- Grab one side of the dough, stretch it upward, and fold it over the center.
- Rotate the bowl 90 degrees and repeat 3-4 times per session.
5. First Rise (Bulk Fermentation)
After completing stretch and folds, cover the dough and let it ferment at room temperature (ideally 70–75°F / 21–24°C) until it increases in volume by about 50–75%. This typically takes 4–6 hours depending on your kitchen temperature.
6. Shape the Dough
- Lightly flour a clean work surface and gently turn out the dough.
- Shape into a round (boule) or oval (batard) by folding the edges toward the center.
- Let rest for 20 minutes (bench rest), then do a final tight shaping.
7. Final Proof (Cold Fermentation)
- Place the shaped dough seam-side up in a floured banneton or bowl lined with a floured towel.
- Cover and refrigerate for 12–16 hours. This cold proof develops superior flavor.
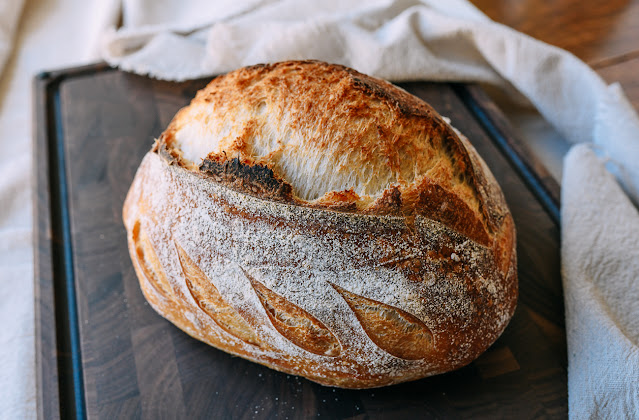
8. Baking Your Sourdough
- Preheat oven to 475°F (245°C) with a Dutch oven inside for at least 30 minutes.
- Turn dough onto parchment, score the top with a razor blade (about 1/2" deep).
- Carefully transfer to the hot Dutch oven and bake covered for 20 minutes.
- Remove lid and bake uncovered for 20–25 minutes until deep golden brown.
9. Cooling and Storage
Let the bread cool completely on a wire rack for at least 1 hour before slicing. This allows the crumb to set properly. Store in a bread box or paper bag for up to 3 days, or freeze for longer storage.
- Dense bread? Your starter might need to be more active or bulk fermentation was too short
- Pale crust? Bake uncovered longer or increase oven temperature slightly
- Too sour? Reduce cold fermentation time
Expert Tips for Perfect Sourdough
- Consistent starter feeding is key - maintain a regular feeding schedule
- Quality flour matters - use unbleached bread flour for best results
- Control fermentation - warmer temps speed up the process, cooler slows it down
- Practice patience - sourdough baking is as much art as science
- Keep notes - record timings, temperatures, and results for each bake
Final Thoughts
Mastering artisan sourdough bread at home is an incredibly rewarding journey. While the process requires patience and practice, the results - a crusty, flavorful loaf made with your own hands - are worth every minute. Remember that each loaf teaches you something new about the living nature of sourdough. Happy baking!
Comments
Post a Comment